Buildings’ outside walls are coated with renderings for aesthetic and structural protection. Weather, dampness, and age can degrade render over time. Deterioration can cause cracks, blowouts, discolouration, and water infiltration. These issues must be addressed immediately to prevent further building damage and maintain value.
Render repair is crucial, and this post will explain and fix common render faults. Render’s Definition, purpose, and deterioration aspects will be discussed. Additionally, we shall discuss render problem remediation methods. By the end of this essay, you’ll know how to repair render, repair alternatives, and when to seek expert help.
Understand Render Repair
Render Definition and Purpose
Render, commonly known as stucco or plaster, is a cement, sand, and water concrete combination used to cover building exteriors. It provides a robust, weather-resistant surface to protect the building from moisture, temperature changes, and other external conditions while improving its appearance. Render can be smooth, textured, or patterned for aesthetics.
Damage-Causing Factors
Render degrades for several reasons. Weather exposure, including rain, snow, sunlight, and severe temperatures, can cause expansion and contraction, cracking, and other damage easily. Leaks or extreme humidity can penetrate the render, softening, blistering, or detaching it from the wall.
Application errors like insufficient curing time or mixing ratios can weaken exterior render and make it more prone to harm. Settlement and vibrations can also damage render. Finally, natural ageing can fade, discolour, or deteriorate render, requiring repair and care.
Common Render Issues
Cracks: Causes and Effects
Render cracks are a prevalent problem. Structural movement, temperature changes, and incorrect initial curing can cause them. These fissures can deepen with time, allowing moisture to permeate the render and damage the structure, as this is a sign that the render layer needs to be repaired. Cracks damage the building and ruin its appearance. Cracks must be repaired immediately to prevent water penetration, moisture, and structural damage.
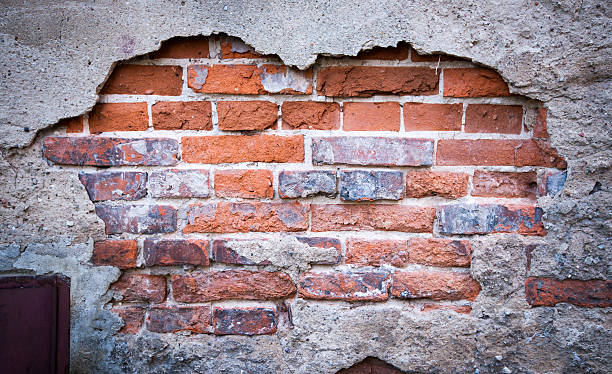
Definition and Impact of Blowouts
Blowouts are rendered pieces that separate from the substrate, revealing the wall. They can result from poor render-wall adhesion, surface preparation, or application methods. Blowouts damage the building’s look and expose the wall to moisture. Dampness, mould growth, and render and building damage can result. Blowouts can be repaired by removing loose render, adding a bonding agent, and reapplying fresh render for a weatherproof finish, damaging the render of your home.
Faded and Discoloured: Causes and Effects
The building’s look can need a faded render. Fading and discolouration can be caused by sunlight, pollution, algae or mould growth, and ageing. Discolouration reduces render aesthetics and may indicate wetness or poor protection. If left unchecked, fading and discolouration can speed up the breakdown and reduce its protective properties. Restoring colour and fixing the causes will keep the amount of render looking good and lasting.
Water-Ingress Risks and Impacts
Water entry into the render occurs through fractures, gaps, or porous regions. Damaged render, inadequate sealing, or severe rain or moisture can cause this. Water entry can cause moisture, mould, and structural damage. It degrades the render look and weatherproofing. Water ingress is addressed by finding the cause, fixing any damage, and sealing the area to prevent further penetration.
Homeowners and render repair specialists must understand these frequent render difficulties. Recognising cracks, blowouts, fading, discolouration, and water infiltration allows preventive maintenance of the building’s exterior.
Assessment of Damage
Visual Assessment of Render
Assessing render damage begins with a comprehensive visual inspection. This requires carefully inspecting exterior walls for deterioration, cracks, blowouts, fading, discolouration, and other concerns. This check should focus on areas where the render meets other building components, such as windows, doors and rooflines, where deterioration is widespread. Check for texture abnormalities, colour variances, and render separation from the wall.
Consider render age and condition when inspecting visually. Older render may be more fragile and need closer inspection. Note any susceptible or damaged locations. Documenting the findings with photos or notes will aid with future repairs and professional communication.
Water Infiltration
Water infiltration can cause substantial structural concerns and endanger the building’s stability. Hence, moisture metres are essential for identifying it. A moisture metre can help find render moisture penetration. Moisture metres measure render and substrate moisture and help prevent water damage.
A moisture metre is placed against the render and reads at various spots. Higher moisture levels may suggest water entry or problems through holes or chips. To get an accurate assessment, obtain enough readings across the affected region.
Use a moisture meter with caution because different renders have varied moisture requirements. To determine the render’s moisture content, consult the manufacturer’s instructions or professionals. If moisture levels are high, further examination and repairs may be needed to prevent further damage and prolong render life.
Homeowners and professionals can assess damage and potential issues with a moisture meter and visual assessment. This information will direct repair actions, allowing for targeted and effective render problem resolution.
The Repairing Process
Step 1: Cleaning the Render Surface
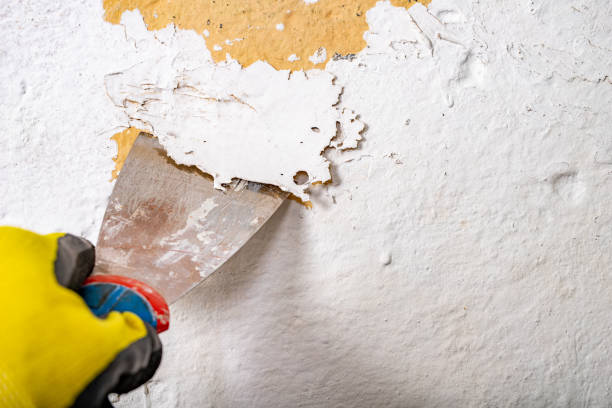
Start by cleaning the render surface before repairing it is essential. This entails cleaning dirt, algae, and loose render debris. Use a stiff brush or power washer to scrub the surface carefully for a stable repair basis. Pay attention to dirt-prone corners and hard-to-reach places. Let the surface dry thoroughly before continuing.
Step 2: Crack Repair
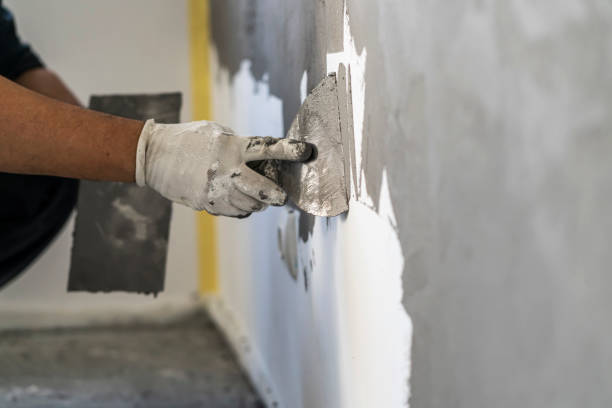
Fill minor cracks and replace more extensive fractures. Render cracks impair its integrity and appearance. Fill minor cracks with a flexible acrylic sealer or premixed render repair compound. Apply filler to the crack and smooth using a putty knife or trowel. After drying according to the manufacturer’s directions, sand it to a smooth finish that matches the render.
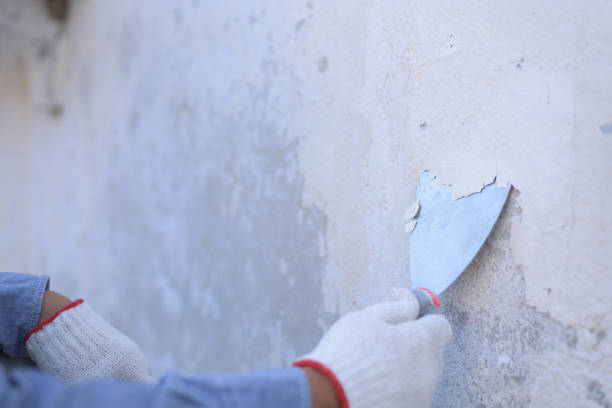
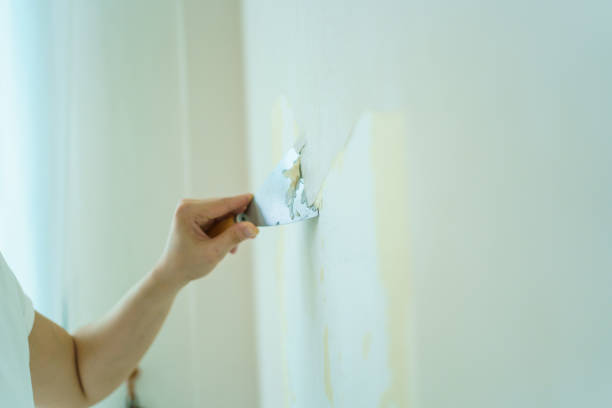
If larger cracks cannot be fixed, the render may need to be replaced. Use a chisel or scraper with clean, straight edges to remove damaged render and scratch coat. Apply a bonding compound to the exposed substrate per the manufacturer’s instructions, then match the texture and thickness of the old render with the new render. Smooth and shape the new render to mix and cure the patch properly and completely.
Step 3: Blowout Repair
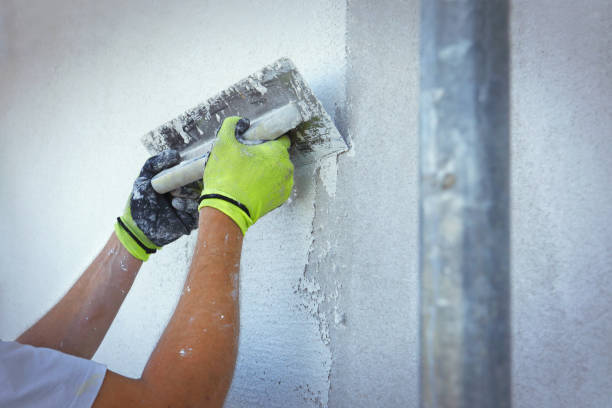
Remove loose render, add bonding agent, and fresh render. Blowouts occur when the render detaches from the wall. Use a chisel or scraper to remove loose render to fix blowouts. Keep the remaining render edges clean and sound. A bonding agent should penetrate the exposed substrate and form a strong link with the new render. Apply and dry bonding agent according to product recommendations with the applied render to the damaged area.
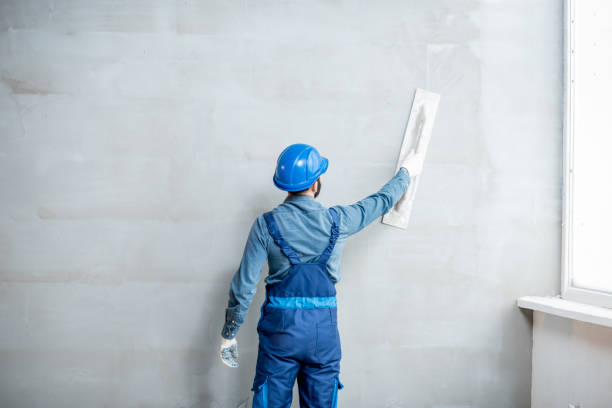
Apply a new render matching the texture and thickness of the previous render when the bonding agent dries. Apply and shape the render with a trowel or float to harmonise with the surface. Before continuing, smooth out any defects and let the new render cure.
Step 4: Colour Matching
Achieving a smooth repair requires matching the restored render to the existing render. This can be done with tinted render or pigments added during preparation. Carefully match the colour to the original render for a unified and appealing effect. Before covering the repair area, test the colour match in a tiny area to make it attractive.
Step 5: Sealing and Protection
A weatherproof sealer protects and prolongs the restored render. Apply a render-specific sealant according to the manufacturer’s directions. To achieve a seamless transition, apply sealant evenly and correctly across the repaired area, extending it slightly beyond the repair boundaries. The sealer will preserve the render from moisture, UV rays, and other environmental influences, preserving its beauty and integrity and giving it the perfect finishing coat. You may have to prepare the wall by applying paint to create a seal of protection!
These restoration techniques help homeowners and professionals restore and maintain render quality. Cleaning dust, filling cracks or holes, repairing blowouts, matching colours, and sealing contribute to a successful restoration.
Provide Repair Cost
Repair Costs
Render repair costs depend on numerous aspects. Restoration costs depend on the damage’s extent, the restoration area’s size, the type of render used, accessibility, and any additional work like cleaning or colour matching. Due to their considerable repair needs, structural or underlying concerns may increase costs. These criteria must be carefully assessed to predict repair costs.
Render Repair Costs
Render repair costs can vary greatly depending on project complexity and scale. According to market trends, more minor render repairs cost $500–$2000. More extensive repairs or second coats can cost more than $5000. These estimates depend on geography, contractor rates, and other considerations. Multiple quotations are recommended to estimate repair costs better.
Get Numerous Quotations
To ensure fair pricing and make an informed selection, get numerous quotations from contractors or pros. This lets you compare prices, services, and expertise. When requesting quotations, provide details about the damage, repair area, and any special requirements. Homeowners can compare estimates to choose the best professional for their budget and needs.
DIY vs. Professional Help
Pros and Cons of DIY Render Repair
Minor repairs can be appealing to DIY. DIY repairs can save money, let you work at your own pace, and be satisfying. For little cracks or damage, DIY fixes may be possible. Pros and drawbacks must be considered. DIY repairs require expertise in render materials, installation, and colour matching. Poor fixes might cause more damage and costly repairs. Before DIY, consider your skills, time, and comfort.
Skilled Render Repair Contractor: Benefits
Experienced specialists have the abilities, experience, and tools to undertake various repairs, ensuring quality. They can precisely analyse damage, provide expert advice and guarantee services. Homeowners may need access to specialised equipment, materials, and resources like professionals. A professional can save time, ensure proper repairs, and bring peace of mind.
Choosing One
Choosing between DIY and professional aid depends on repair intricacy and time constraints. DIY repairs may be possible if you have the expertise and time. See professional aid for more severe damage, structural difficulties, or lack of competence. Consider the dangers, long-term costs, and impact on property value. Make an informed decision based on these considerations to ensure successful render restoration and investment lifetime.
Key Takeaways
- Explore common render problems like cracks, blowouts, fading, and water infiltration, impacting appearance and structural integrity.
- Discover visual inspection and moisture meter use for identifying render damage and water penetration, aiding targeted repairs.
- Learn step-by-step techniques, including surface cleaning, crack and blowout repairs, colour matching, and weatherproof sealing for effective restoration.
The Bottom Line
This article has covered several aspects of how to repair renderings to assist homeowners in understanding and making informed decisions. We covered visual damage assessment and moisture metres to detect water penetration. We worked on cleaning the render surface, mending cracks, correcting blowouts, colour matching, and putting in a weatherproof sealer. We also looked at repair cost considerations, average cost ranges, getting several quotations for fair pricing, and DIY vs. professional repair according to the necessary render spread to protect the walls.
If you notice render errors, act quickly. Delaying repairs can cause more damage, structural difficulties, and higher expenditures. You may preserve your home’s exterior by fixing render damage quickly. Repairs should be done quickly, whether you do them yourself or employ a technician.
Consult professionals for accurate assistance. Render kind, damage, and underlying issues differ widely. Therefore, consult with professionals like experienced contractors or render specialists for precise, customised guidance. They can evaluate the damage, make expert recommendations, and fix it precisely. Consulting professionals ensure effective repair and reduce damage!