Are you looking for an innovative, beautiful way to transform your backyard? Have you ever considered rendering garden walls to bring a new character and charm to your landscape? Look no further – this masterclass in ‘Enchanting Garden Walls: A Masterclass in Rendering Beauty’ will teach you how to bring style and sophistication to any space. With the right materials and techniques, anyone can learn how to render their unique, eye-catching, and practical outdoor wall feature.
Discover different ways of creating stunning visual effects from detailed stonework or classic brickwork; discover various colour combinations with creative texturing; learn key methods for achieving perfect results every time. Follow our clear instructions throughout this helpful guide – start planning your dream project today!

How to Render a Garden Wall: Pro Tips and Techniques
Dive into the world of garden wall rendering with our comprehensive guide. Learn the art of rendering step-by-step, enriched with professional tips and techniques to transform your outdoor space.
Preparing the Wall
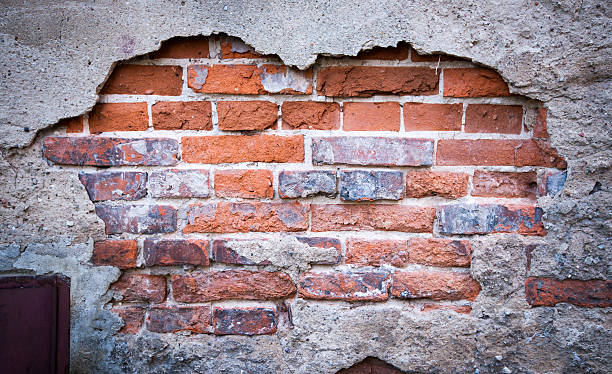
The first step to rendering a garden wall is to prepare the wall. Removing any old render using a brush or chisel is essential. You can also use a power washer if the wall is too dirty. Once you’ve removed the old render, ensure the wall is clean, dry, and free from dust or debris.
Mixing the Render
The next step is to mix the render. There are various options when it comes to mixing the render. You can either use a pre-mixed bag or mix the render yourself. If you’re mixing the render yourself, follow the manufacturer’s instructions. Use a good quality mix to avoid any issues in the future.
Coating the Wall
Once you’ve mixed the render, it’s time to apply it onto the wall. Take a brush and brush water across the wall. It will help the render to adhere to the wall properly. You apply the render onto the wall in a thin layer using a trowel. Make sure you spread the render evenly across the wall.
Building Up the Render
After you’ve applied the first layer of render, leave it to dry for a few hours. Once dry, apply another layer of render using a thicker coat. Repeat this process until you’ve achieved the desired thickness and texture.
Advice and Tips
Consider these expert tips before rendering a garden wall:
- Ensure the wall is pristine—clean, dry, and free from dust or debris.
- Opt for a high-quality mix to prevent future complications.
- Apply the render in thin layers, building up the thickness as you go along.
- Use a trowel to spread the render evenly across the wall.
- Remove any excess render before it dries for a neat and professional finish.
- Let the render dry completely before painting or decorating the wall.
At last, you can render a garden wall like a pro. Enhancing the appearance of your outdoor space can be easily achieved through a straightforward and cost-effective method. This comprehensive guide is designed to assist you in properly rendering a garden wall from the initial stages to completion. We are certain that you will consistently achieve impeccable results by following our expert advice and techniques. Stay informed on the latest home improvement tips and tricks by subscribing to our newsletter!
Tools You'll Need for the Job
To render a garden wall, you’ll need the following items:
- Plastering hawk
- A choice of rendering mortar
- Trowel
- Mixer and mixing bucket
- Bristled garden brush
- Large sponge
- Long and smooth wooden plank
- An electric mixer
- Rendering mesh
Choosing Your Mortar Mix
The first step in rendering your garden wall is choosing the right mortar mix type. There are several different options available, each with its pros and cons.
- Cement and Lime Mix – This is the most common type of mortar mix and is ideal for rendering garden walls. It offers good adhesion and a long-lasting finish.
- Cement, Lime and Sand Mix – This mortar mix is perfect for creating a more rustic look. It is easy to mix and apply but can be prone to cracking over time.
Choosing Your Tools
Once you’ve chosen your mortar mix, it’s time to gather your tools. You’ll need a trowel, a plastering hawk, a mixer and mixing bucket, a bristled garden brush, a large sponge, a long and smooth wooden plank, an electric mixer, and rendering mesh.
Learn more about 2023 House Rendering Cost Guide: How Much Does Rendering Cost?
What Is SBR, And Why Use It In Render?
If you plan on transforming your outdoor space by rendering your garden walls, you may have encountered the term “SBR” before. But what exactly is SBR, and why should you consider using it in your render mix? In this guideline, we’ll provide step-by-step advice on preparing your render mix with SBR and explain the benefits of using this option.
What is SBR?
SBR, or Styrene Butadiene Rubber, is a polymer that can be used as an additive in building materials such as render mixes. When added to a rendering mix, SBR enhances the material’s durability, strength, and water resistance. SBR forms a strong bond with the existing surface, providing a long-lasting coat that can withstand the elements.
Why Use SBR in Rendering Garden Walls?
When rendering garden walls, using SBR can provide several benefits. Here are a few reasons why using SBR in your render mix is a good idea:
- Enhanced Longevity: Incorporating SBR enhances the render’s resilience, reducing the likelihood of cracks or deterioration over time. It is particularly crucial for exterior applications, where the render is subjected to challenging weather conditions.
- Increased Strength: SBR can increase the strength of the render, making it more resilient against impact and wear and tear.
- Better Water Resistance: SBR can improve the water resistance of the render, preventing moisture from seeping into the wall and causing damage.
How to Mix SBR into Your Rendering Mix
If you have faith in your rendering skills and wish to incorporate SBR into your mix, follow this detailed guide to prepare your audio blend:
- Per the manufacturer’s instructions, prepare your rendering mix normally. It generally entails blending sand, cement, and water to achieve a texture easily spread onto the wall.
- After preparing the rendering mix, incorporate the SBR into the mixture using a 1:1 ratio, combining equal parts of SBR and water.
- Mix the SBR thoroughly into the rendering mix, ensuring it’s evenly distributed throughout.
- Applying the mixed render across the wall using a brush in an even coat.
That’s it – you’ve now successfully incorporated SBR into your rendering mix! Doing so ensures that your render mix is stronger, more durable, and better equipped to withstand the elements.
Learn more about Rendering the Garden Wall.

Choosing the Right Materials for Rendering
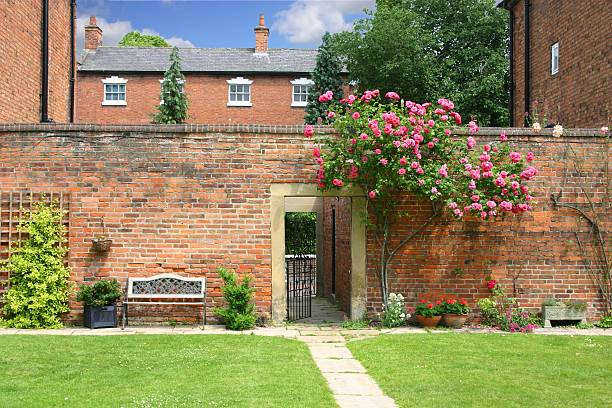
Revamping garden walls is a widely embraced and impactful method to infuse personality and allure into your outdoor area. Through straightforward procedures and the selection of appropriate materials, you can fashion an enduring and aesthetically pleasing focal point.
Step-by-Step Advice for Choosing Materials
Many options exist when choosing the right materials for rendering a garden wall. First, you’ll need to prepare the wall by cleaning it thoroughly and ensuring it’s dry. Next, you’ll need to mix the render according to the instructions provided. It is a crucial step, as the mix’s consistency will affect the final coat’s quality.
Old Render and Coat Options
If your garden wall already has a coat of old render, remove it before applying a new coat. It is done using a wire brush to scrape the old material. Once this is done, you can apply a new coat of render. Different options exist, including traditional lime render or modern synthetic options. Lime render is a more expensive option known for its durability and aesthetic appeal.
Creative Texturing and Color Combinations
Once the render is applied to the wall, you can get creative with texturing and colour combinations. Different tools, such as a brush or trowel, can achieve various effects. You can also incorporate different stones or bricks into the design, adding visual interest and texture.
Expert Advice and Tips
You can follow these steps to render your garden wall if you’re confident in your DIY skills. However, if you need more experience, it’s always best to seek expert advice. Many hardware stores provide workshops that teach homeowners how to render garden walls.
Key Takeaways
- Clean, dry, and grease-free surfaces ensure a strong bond.
- Opt for lime-based renders for breathability and durability.
- Experiment with colors to enhance garden aesthetics.
- Render correctly for a durable, weather-resistant, and visually pleasing result.
FAQs
How much does it cost to render a garden?
Costs vary but expect between $5 and $10 per square foot for professional rendering. DIY costs depend on the materials chosen.
Can you render a garden wall?
Professionals and enthusiasts alike can render garden walls to enhance aesthetics and durability.
Can I render a wall myself?
Yes, DIY wall rendering is possible with the right tools and materials. Follow step-by-step guides for a successful project.
How do you render a wall for beginners?
Start with surface preparation, use a bonding agent, and follow a simple rendering process. Online tutorials provide beginner-friendly guidance.
Conclusion
Rendering your outdoor walls is one of the best ways to bring life to your backyard. Whether aiming for an understated classic brickwork style or something artistic and sophisticated, this masterclass has provided all the details needed for a perfect result.
Our clear directions have helped guide you through the process, and by the end, you have a stunning outdoor wall feature that captivates and adds practicality to any area! Be sure to pull out all the stops and put your unique spin on each step; let your personality shine through as you develop a beautiful garden wall design – start planning now and be creative!